
Dastra now integrates with the Zapier automation platform and the 4000+ applications in its library. If you are not familiar with Zapier, please read our documentation before going any further.
In this article, we'll walk you through the step-by-step process of how to automatically add data subject requests from a Microsoft Outlook email to Dastra.
Follow the guide and set up your first connector !
Sync your data subject requests received on an email with Dastra
There are currently two ways to collect data subject requests in Dastra: (reminder about data subject requests)
- The first, through our consent widget that you can embed on your website, which will automatically add any new requests to your module for you.
- The second, by manually adding to your module the requests received by email (or stored in a third party application). This second method concerns a large majority of our customers who waste a lot of time manually adding data to Dastra.
We will explain how to automate this workflow so that you can take advantage of all the features of our data subject requests module, without wasting precious time on data entry.
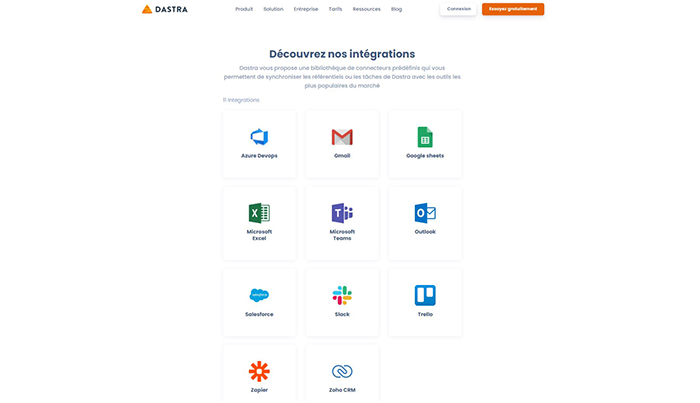
Access ou integrations library
You can find our library on our website (Product > Api and integrations > View integrations) or directly from the settings tab of your workspace (Settings > Integrations).
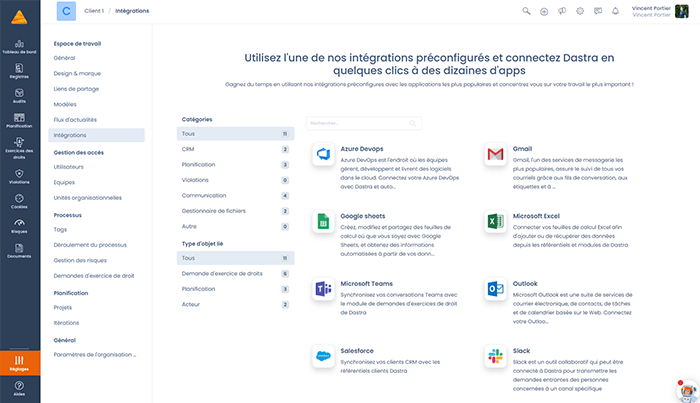
Select the application on which you receive your requests
For the example, we will select Outlook as the application to connect with Dastra. If the application you are receiving emails from is not in the list of applications for which we offer a template, we invite you to search for the application directly in the Zapier catalog and configure the integration from the Zapier zap editor (feel free to contact us if you need guidance on how to do this).
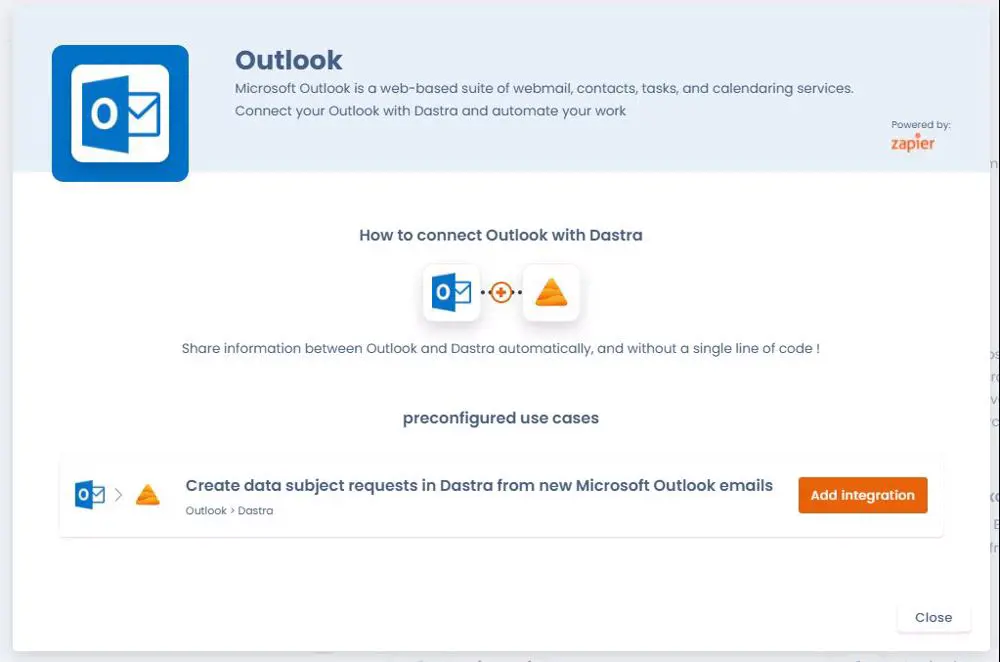
So we click on Outlook, which opens a window containing the integration templates we offer between Dastra and Outlook
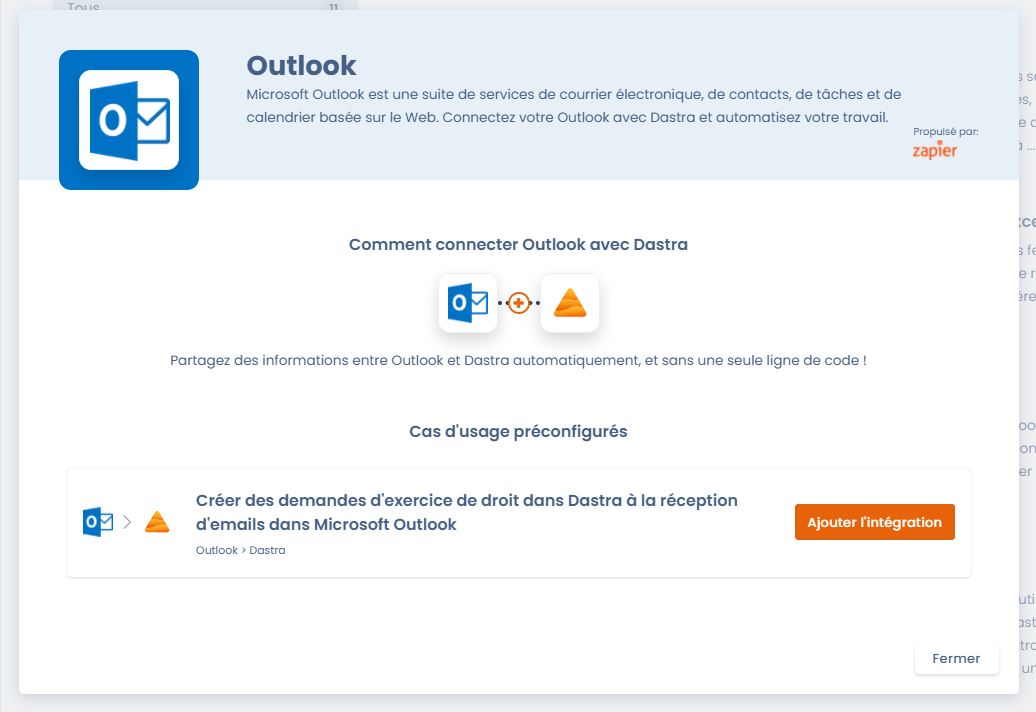
We look for the template we are interested in, here "Create a new data subject request in Dastra when receiving emails in Microsoft Outlook" and click on "Add integration".
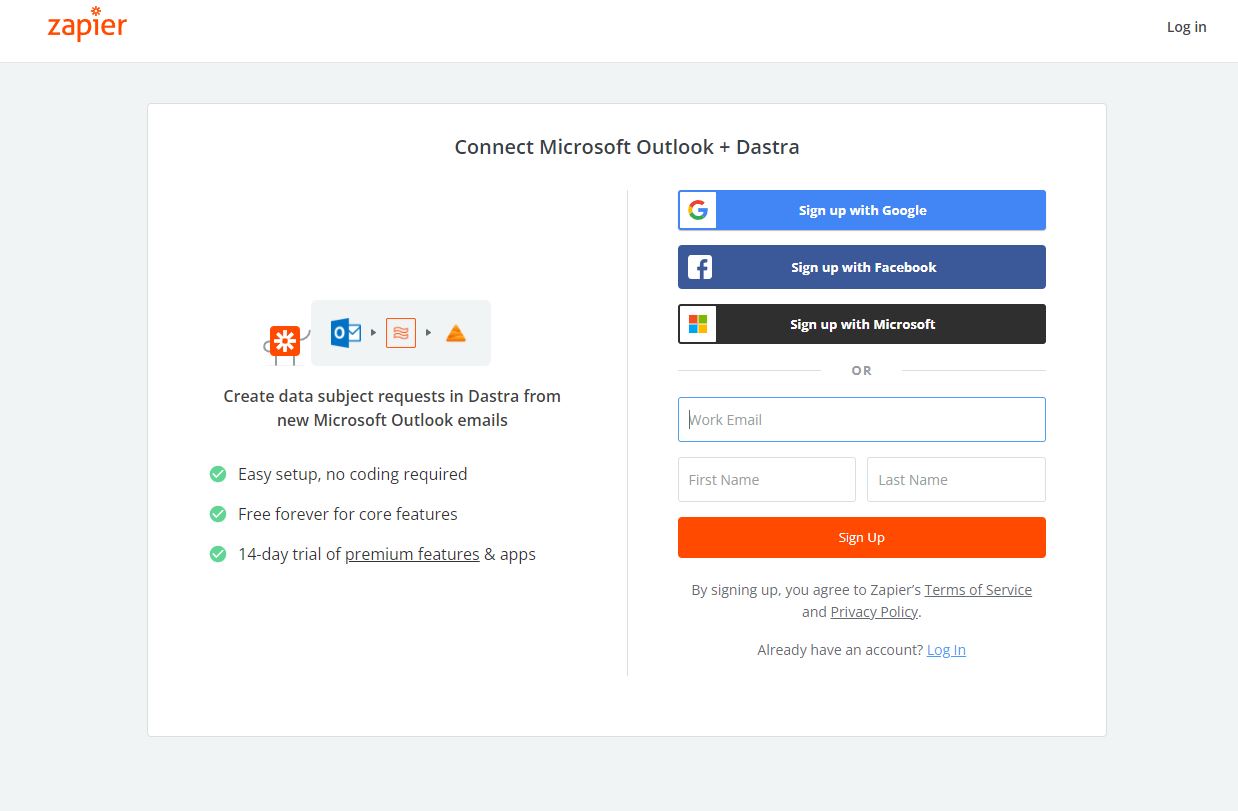
Login to your Zapier account (or create a new account)
If you already have a Zapier account and are logged in, you will be taken directly to the Zapier Zap Editor with our pre-configured template. If you don't have an account, or if you are not currently logged in, you will be directed to a Zapier login page
Fill in the integration form
In order for Outlook and Dastra to communicate automatically, you need to fill in some information in the Zapier editor (you need to connect Zapier to your Microsoft Outlook account as well as to Dastra).
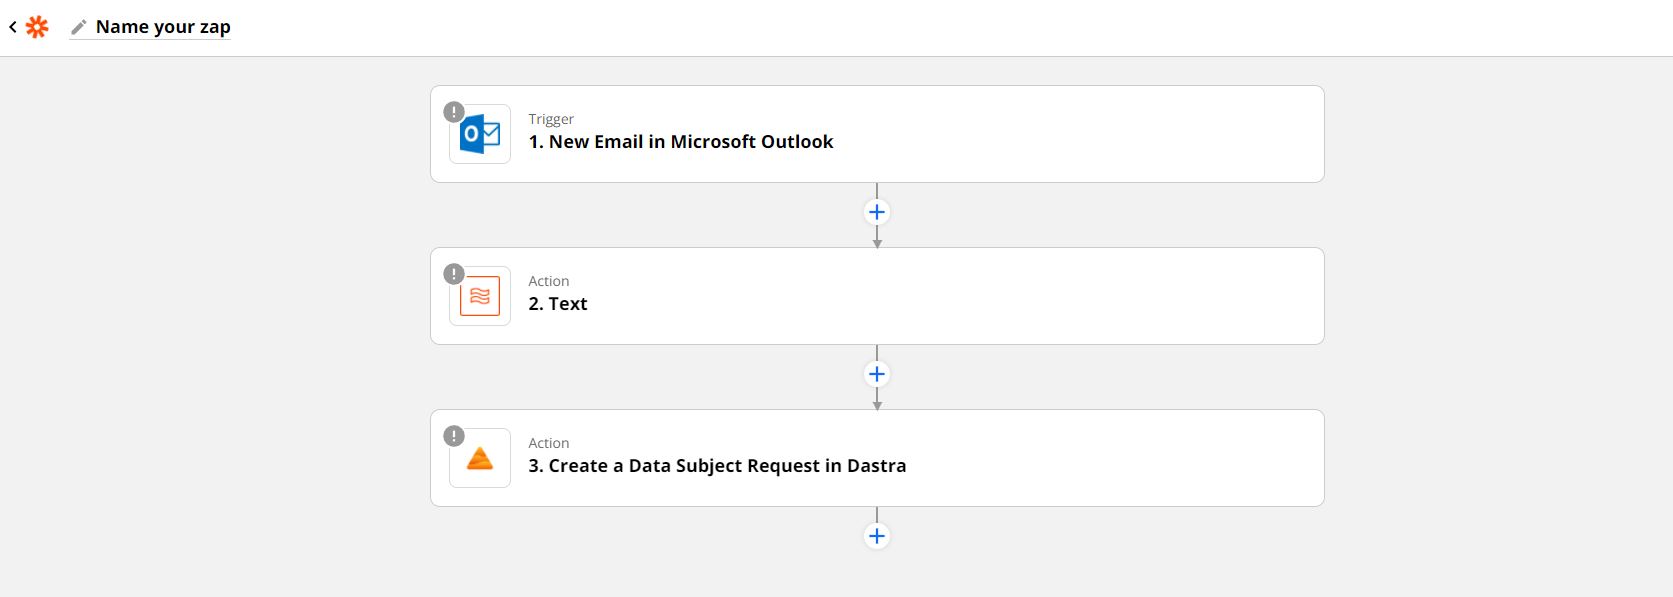
Start by naming your Zap by clicking on "Name your zap" and then configure the trigger part of the Zap by clicking on "New Email in Microsoft Outlook".
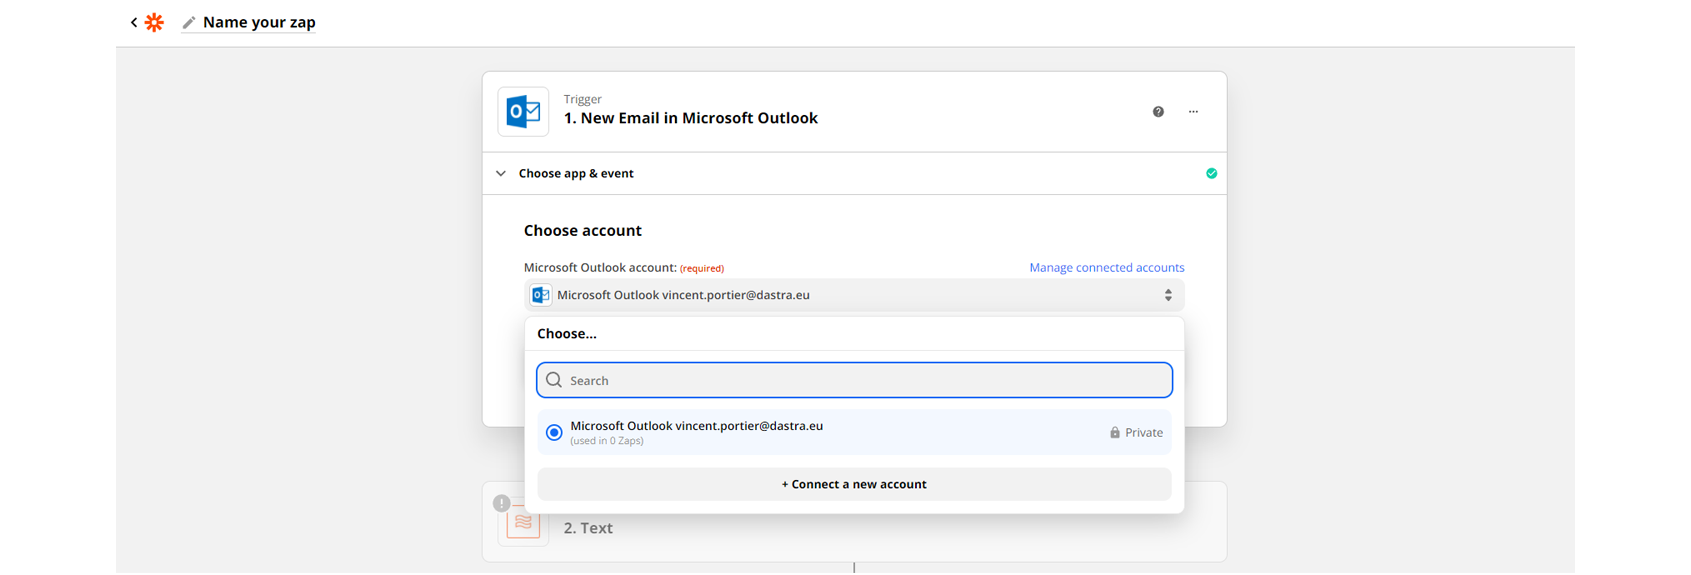
Connect your Microsoft Outlook account and select the email address you want to connect with Dastra (the one you receive your data subject requests on).
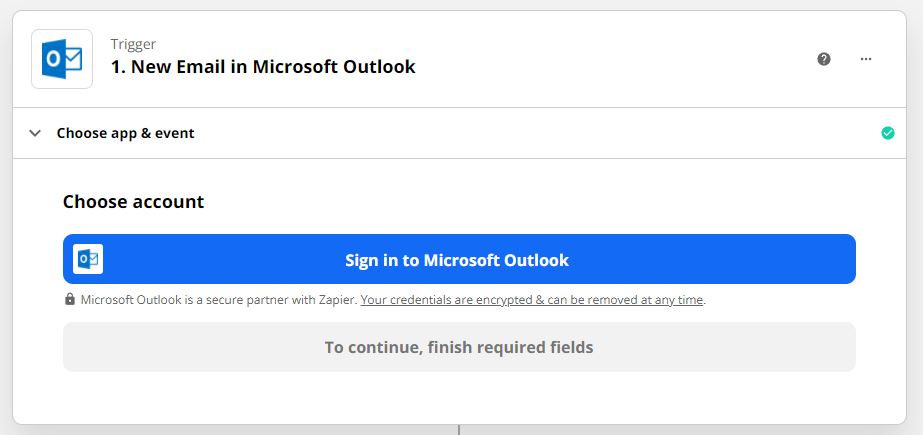
Click "Test trigger" to verify that Zapier can retrieve your recent emails before clicking continue.
Now you can configure the actions to be taken when you receive a new email in your Outlook inbox.
The "2. text" action does not require any configuration on your part and is just used to reformat some fields sent by Outlook.
Go directly to the configuration of the action on the Dastra side by clicking on "3. Create a data subject request in Dastra". In the same way as for Outlook, you need to connect the Dastra account on which you want to generate the new data subject requests.
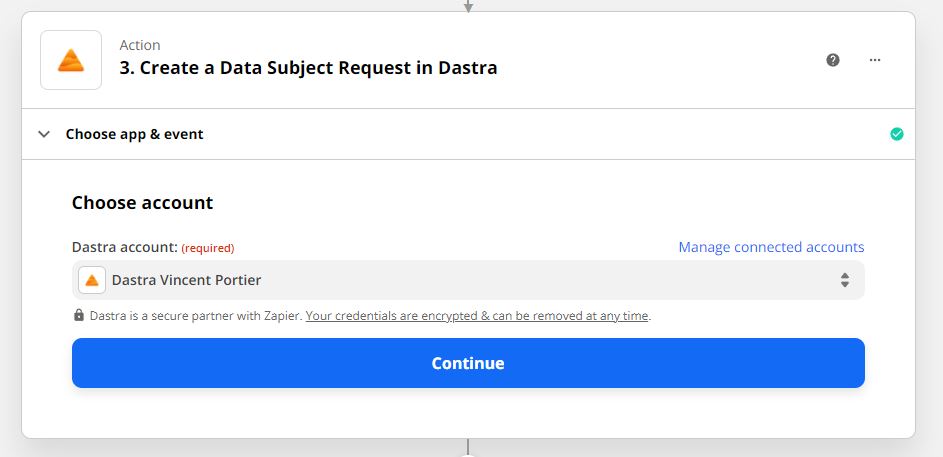
Select the account and click on "Continue".
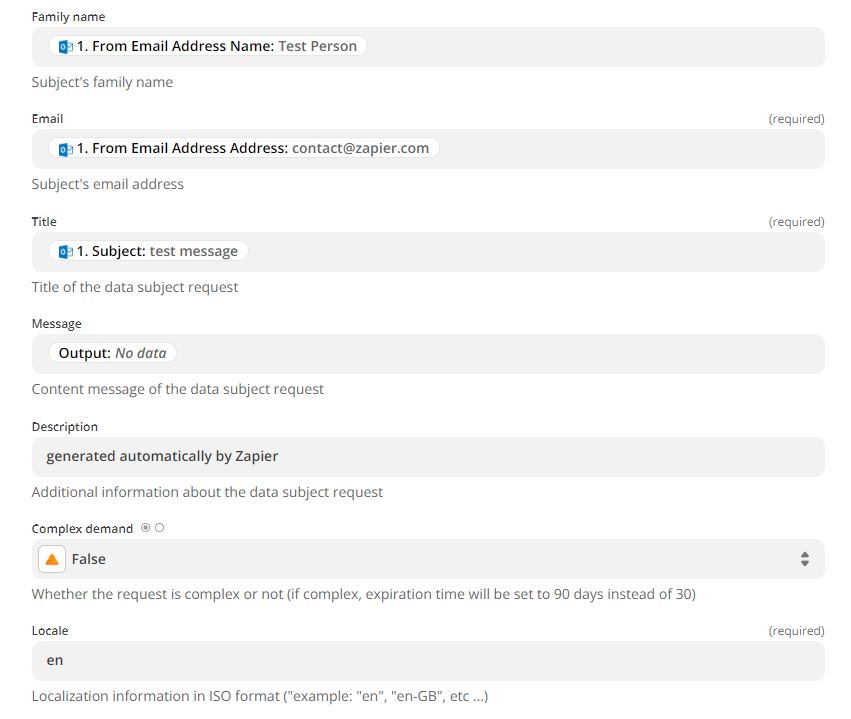
You are now at the stage of mapping the information received in the email to the fields in a Dastra data subject request. Simply put, Outlook will return a number of fields that we map to the fields in a Dastra subject request.
First, you will need to select the Organization, then the Workspace, and finally the Organizational unit where you want to add the new requests. These fields must be completed consecutively in order to work.

The rest of the mapping is pre-configured and you can click "Continue" at the bottom of the form to finish setting up the automation.
By default, we fill in the following fields like this:
- Request type as "Unknown."
- Name associated with the request with the name of the sender
- Email associated to the request with the email of the sender
- Request title with the email subject
- Message of the request with the text content of the email
- We add a message in the request description so that you can find the requests generated automatically by Zapier easily
- Complex request set to false
- Language of the request ("locale") to English ("en")
- Other fields of the request are left empty
Feel free to change this mapping to fit your needs (the fields request type, email, request title and language are required to activate the integration).
Test and activate your integration
Once you click "Continue", Zapier will offer to test the action by clicking "Test and continue". If everything works correctly, a test data subject request should be inserted in the Dastra workspace you selected.
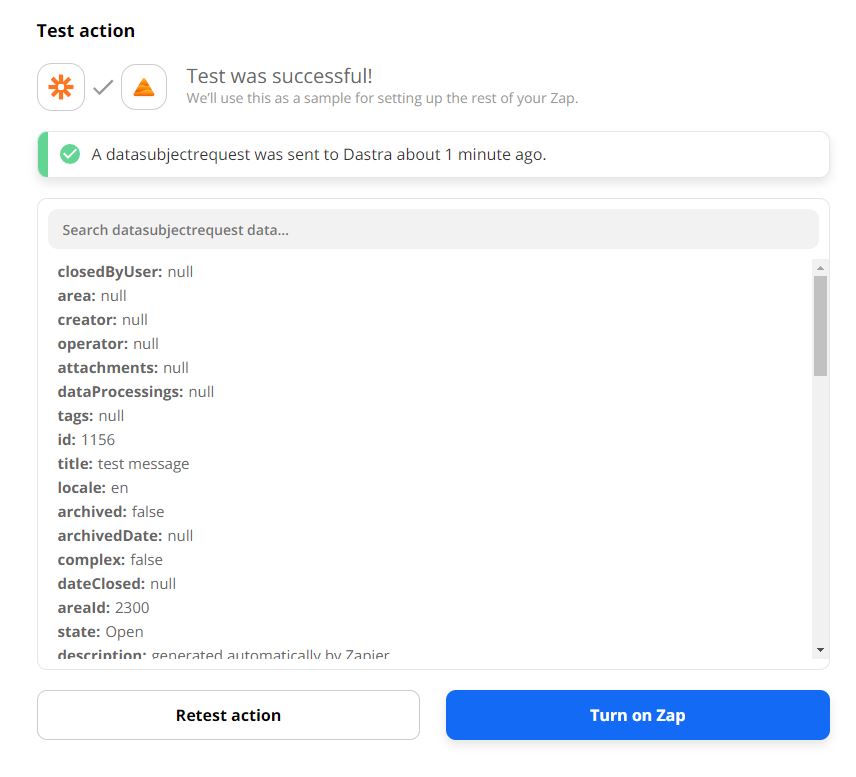

If this is the case and you have received the test request in your workspace (the synchronization should be almost instantaneous), you can activate your integration by clicking on "Turn on Zap". When the selector in the upper right corner switches to "On", your Zap is active and your data subject requests eceived in your Outlook mailbox will be automatically added to your Dastra account.

Please note that the free Zapier plan limits you in the number of tasks you can automate each month as well as in the applications you are allowed to connect or the number of actions an integration can contain. An integration that requires more than one action (which is the case here since we are doing a reformatting action before performing a publishing action in Dastra) also requires a paid Zapier account. [You can find out more about Zapier's pricing at this address (https://zapier.com/app/billing/plans)
Manage your integrations
You can manage all your integrations (your Zaps) from your Zapier account. Zapier provides a workspace that will give you statistics on your zaps and, if necessary, error logs if some of your zaps encounter problems.
Conclusion
Congratulations! You have taken your first steps into the world of automation!
We hope this blog has given you a good overview of our new feature and the possibilities it offers you. We encourage you to set up automated workflows to save time and focus on what really matters to your business.
Please contact us if you have any ideas for automation or if you are having trouble setting up Zaps, we'll be happy to help. And we also encourage you to share with us your automation success stories that have saved you a lot of time, it always makes us extremely happy to see our users getting the most out of the Dastra application!
See you soon on the blog for more examples of automatable workflows!